Home /
Projects /
Tampines St 86 — study-room partition
Project journal · HDB renovation
A glass-partition study room, carved from the living room
A family in Tampines needed a quiet corner for the children to do homework — without
walling off the light or the breeze. Here's the whole journey — from a bare wall and the client's
own drawing, through the build on site, to the finished glass-partition study room.
HomeBlk 871B Tampines St 86
TypeHDB 5-room flat
ScopeLiving-room partition · study room
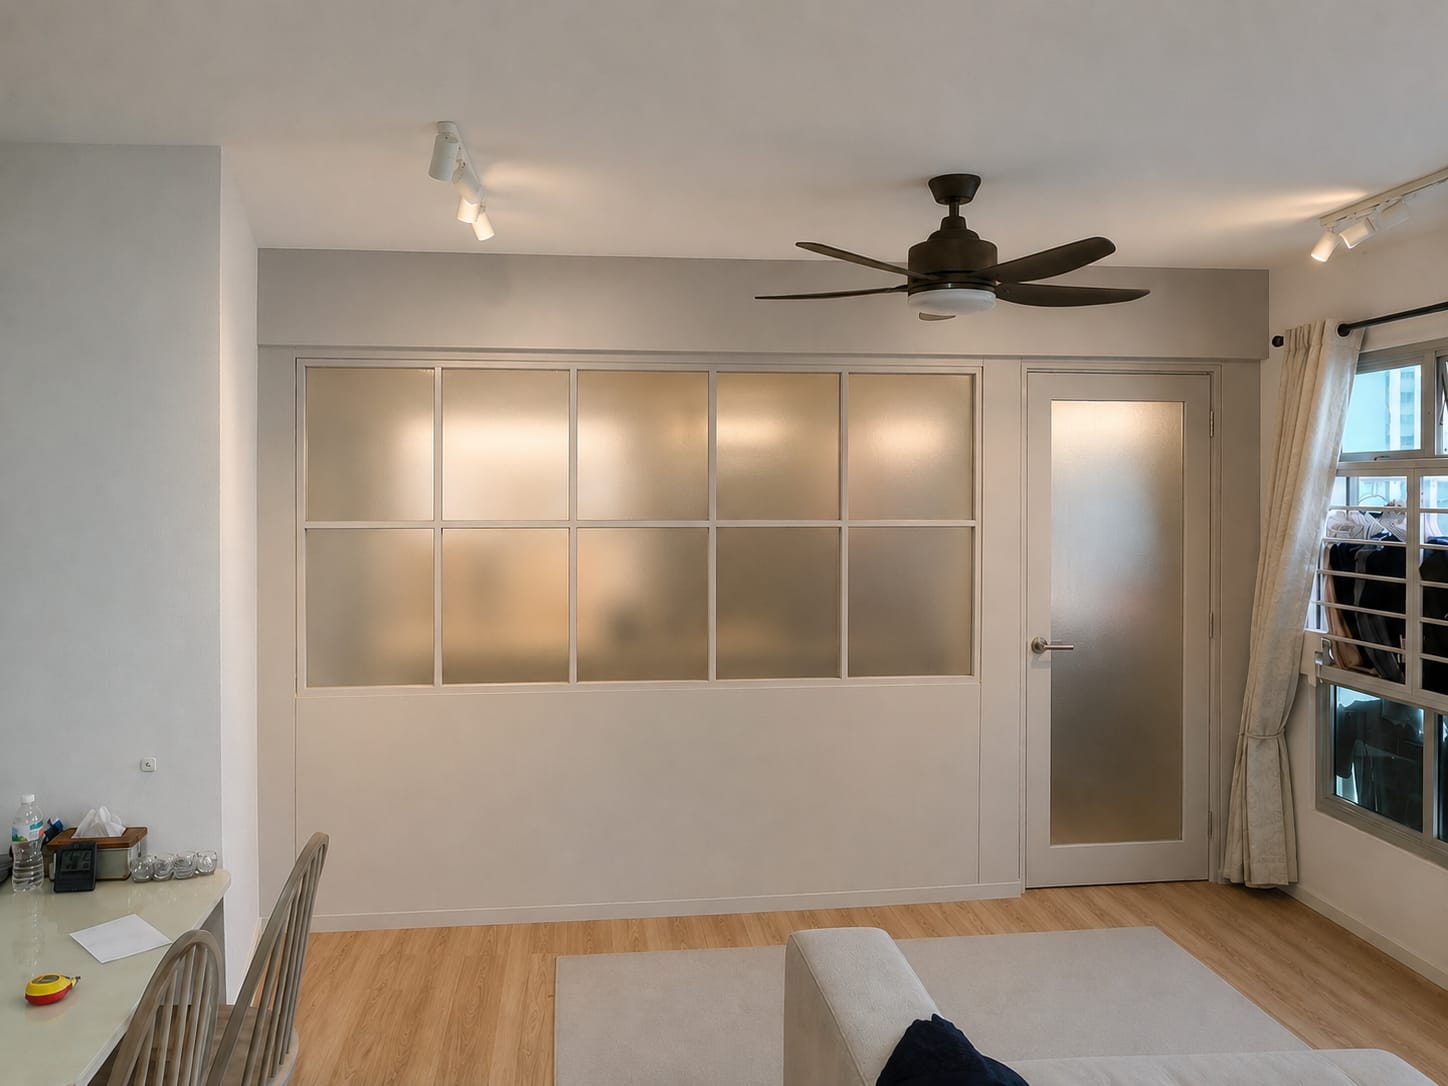
After. The finished living room — the new study sits behind the half-wall glass
partition, and the window light still reaches both spaces.
01 — The brief
"We want a study room for the children"
The owners came to us with a clear goal: a dedicated study room for their children, partitioned
off from the living area. The catch — like most HDB living rooms, this one earns its brightness
from a single window wall. A solid floor-to-ceiling partition would have boxed the new room into a
dark, sealed cube and dimmed the living room behind it.
So the real problem wasn't building a wall. It was dividing the space while keeping light
and a sense of openness on both sides — a quiet zone the parents could still see into.
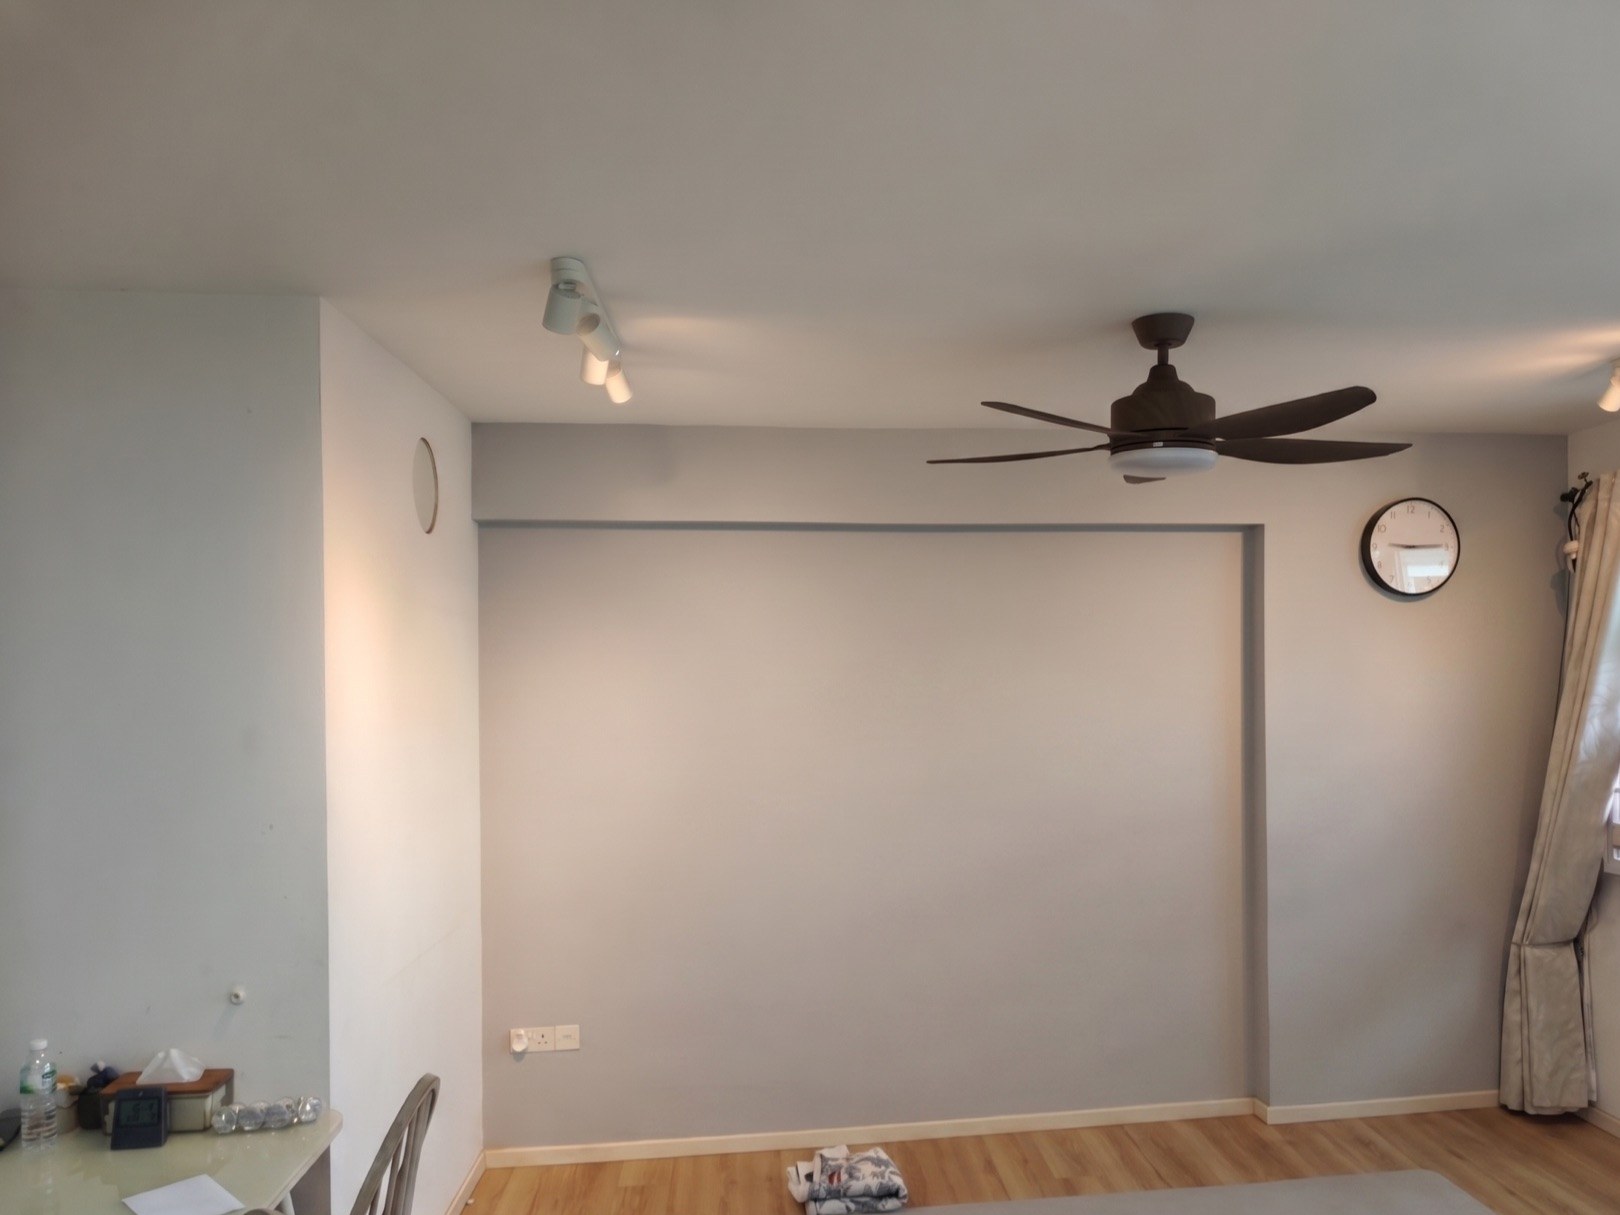
Before. The living room as we found it — one long blank wall beside the window,
and no defined space for the kids to study.
02 — What they pictured
A drawing, and a few reference photos
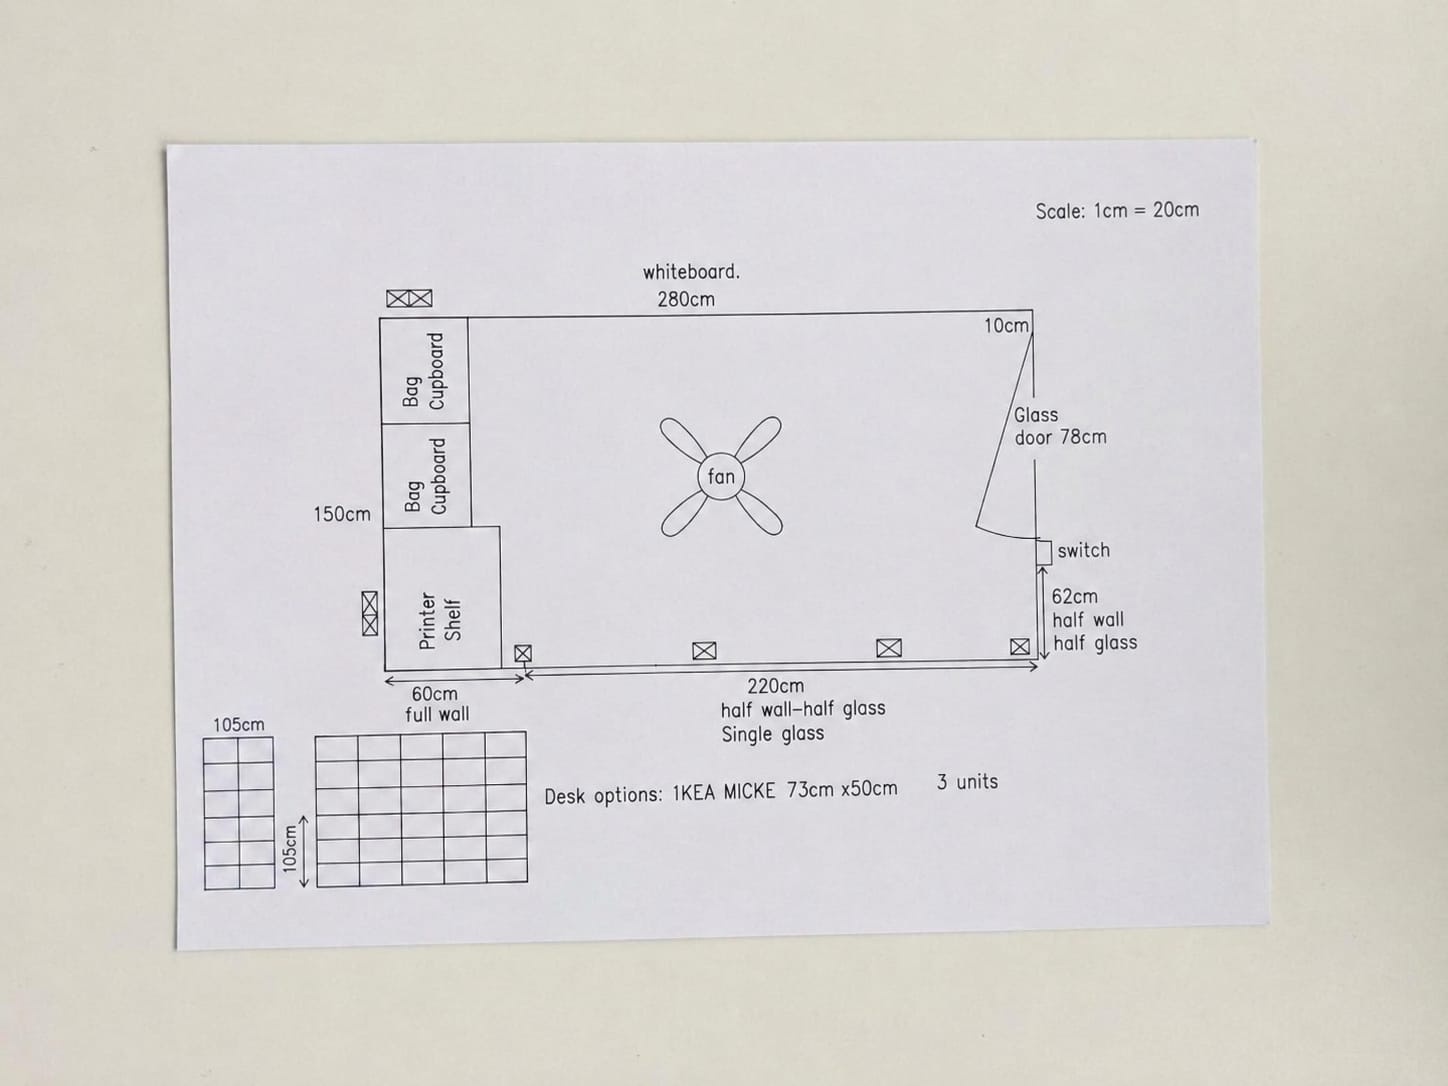
The clients had clearly thought it through. They handed us a measured sketch of the room — fan in
the centre, a 280cm whiteboard wall, bag cupboards and a printer shelf along one
side, an 78cm glass door, and a run of half-wall, half-glass
facing the living room. They even scaled it (1cm = 20cm) and spec'd the desks: three IKEA MICKE
units, 73 × 50cm each.
The client's drawing. A measured plan — glass door, half-wall/half-glass run,
cupboards, printer shelf and three desks, all to scale.
Alongside the sketch they sent reference photos of the look they were after: a framed glass
partition with a glazed door, the lower half solid for privacy and to hide cabling, the upper half
glass to borrow light. That gave us everything we needed to price it accurately.
The client's rendering. The family also shared this rendering of the look they
wanted — a half-wall glass partition with a glazed door. A visualisation they made themselves,
not a photo — but it set the target we quoted and built to.
03 — Site visit & measurements
Confirming it on site
Before quoting, we visited the flat to take our own measurements and check the things a drawing
can't show — ceiling height, the existing fan and lighting positions, where the power points sit,
and how the new partition would meet the window and the floor. We confirmed the partition line, the
door swing, and where the electrical points for the study would need to go.
A drawing tells us what the family wants. The site visit tells us what the flat will actually allow.
With real measurements in hand, we could price the job accurately.
04 — The final quotation
What it came to
The family went ahead with the partition. The quotation covered the glazed panels and
door, the partition wall, electrical works and
painting — the core of turning one blank wall into a light, glass-fronted study.
A few extras were added along the way as the job progressed: fan and lights for the study, a couple
of extra power points (including one on the partition facing the living room), relocating the living
room's ceiling fan and lights, a small change to the window grill, and skirting — the skirting thrown
in at no charge.
All in — partition, glazing, electrical, painting and the extras — the job came to a little under
S$4,000. Every project is priced to its own measurements, scope and finishes, so
your figure will differ.
05 — The build
Framing the partition
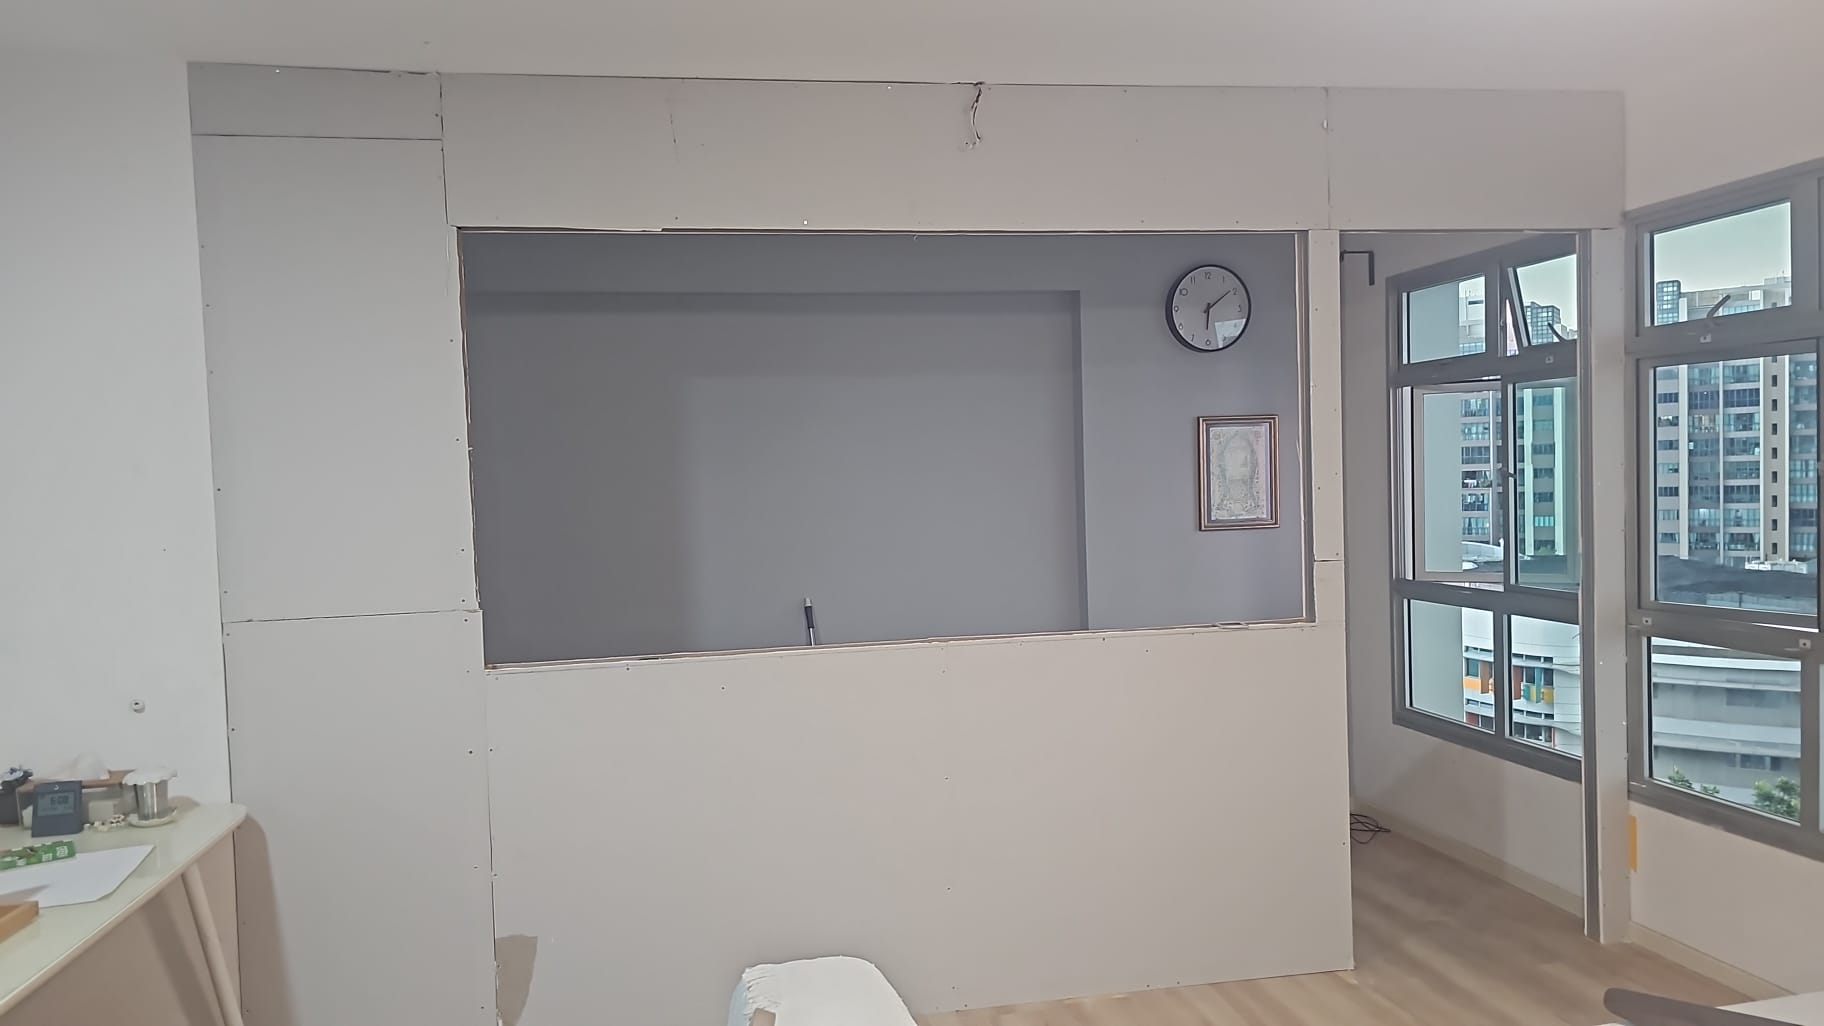
With the quote approved, our team got to work. We framed and boarded the new partition
with sound isolation inside the drywall — important for a study sitting right off
the living room — and formed the half-wall, leaving a clean opening for the glazing to drop into.
Electrical points for the study were run in before the boards closed up.
During renovation. Drywall up and the half-wall formed, with the opening ready
for glass. Sound isolation sits inside the partition.
At this stage the shape of the new room is already there — you can read the study taking form off
the living area, with the window light still reaching both sides.
06 — The finished result
How it turned out
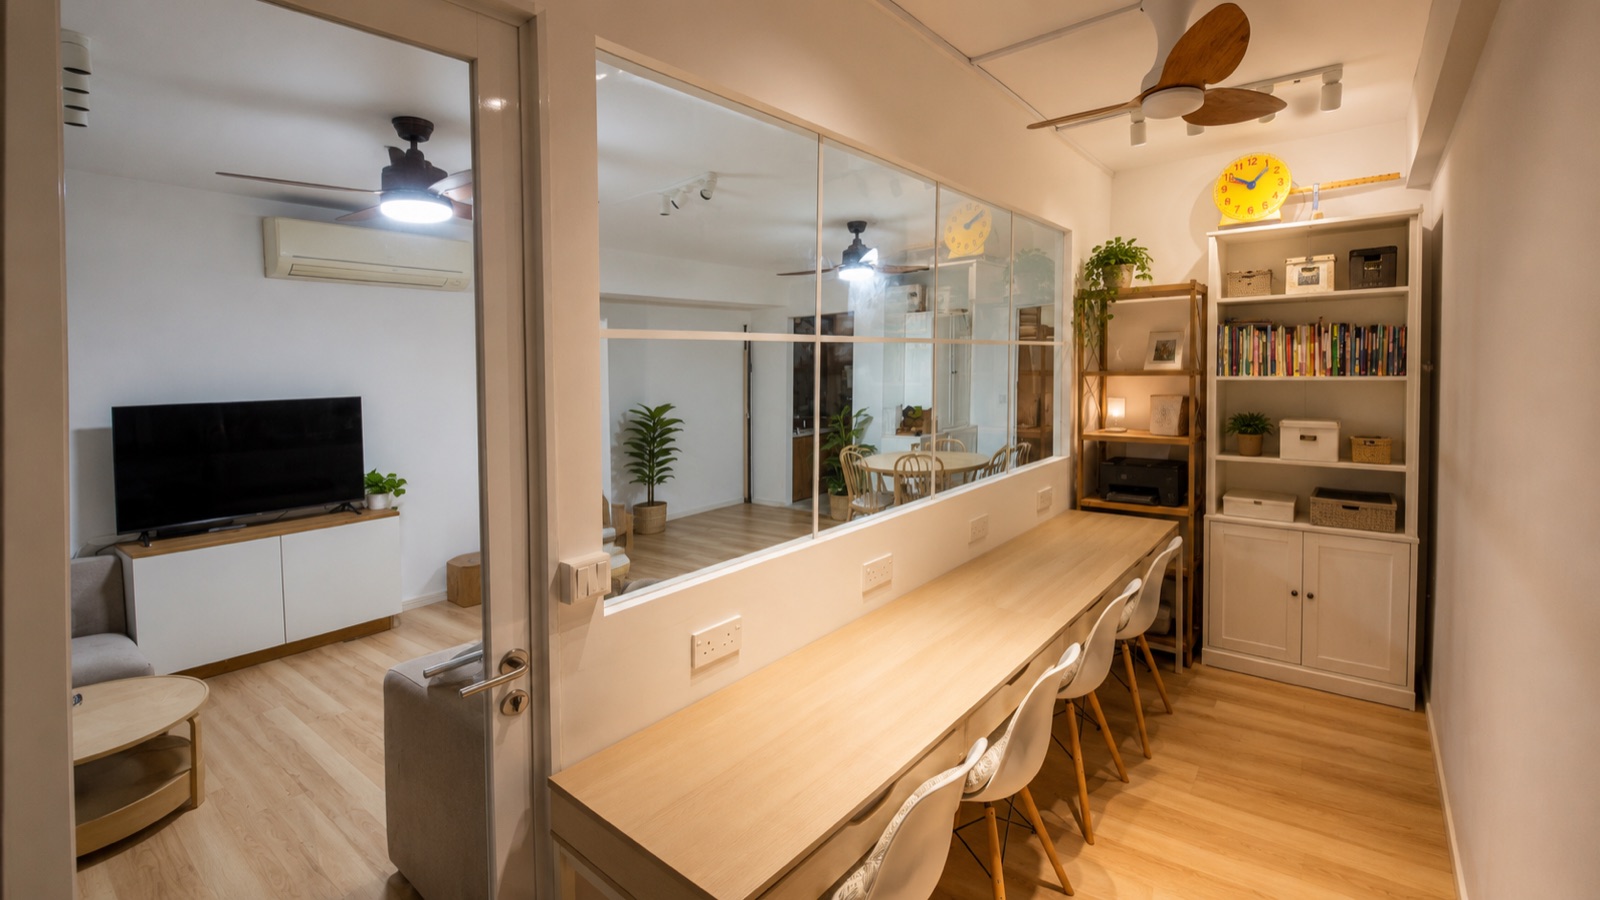
Here's the completed study. The half-wall glass partition does exactly what the family asked for —
solid below for privacy and to hide cabling, glass above to borrow light from the window wall, and a
glazed door that closes when it's time to focus. A long shared desk runs the length of the glazing,
with open shelving and storage alongside — a proper study for the children, carved out of the living
room without darkening either space.
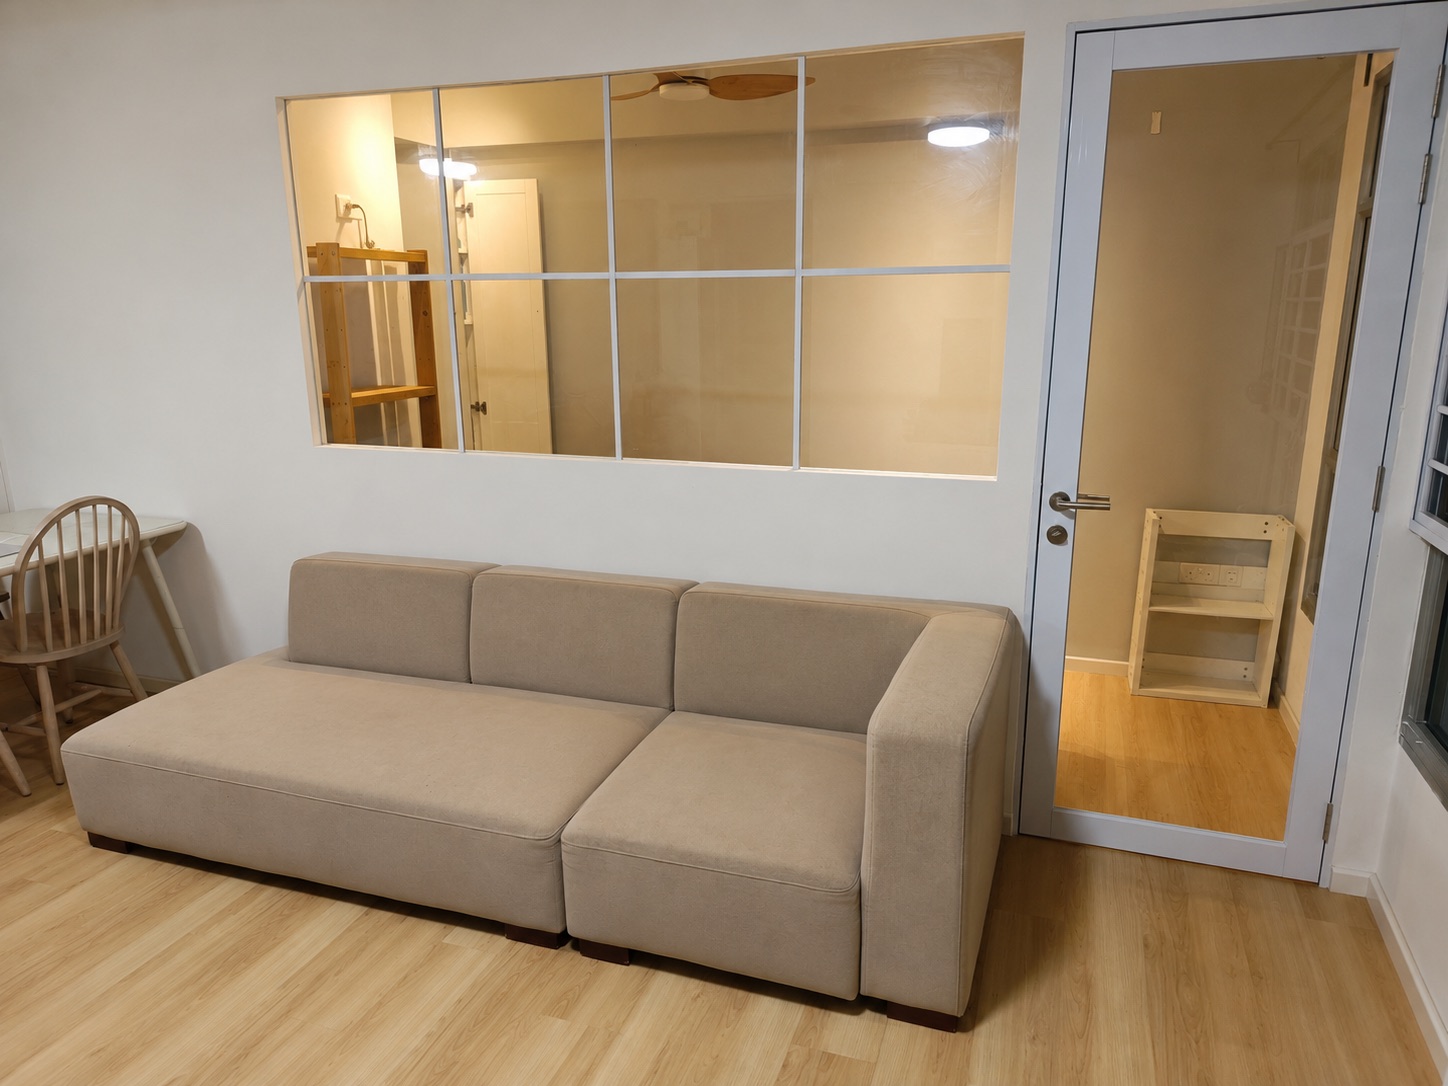
After — the study. The completed study: a shared desk along the glazed
partition, storage and shelving alongside, and the living room still visible through the glass.
After — the living room. The partition from the living side — the study tucked
behind the glass, and the window light still reaching the whole space.
5-roomHDB flat
Half-wallGlass partition
Glass door78 cm
InsulatedSound-proof core
Thinking of partitioning a room?
Send us your space and what you have in mind — we'll get back to you with a clear quotation.